Guía de bloques de contenido
Texto enriquecido
El texto es la base de casi cualquier formulario o página digital, proporcionando instrucciones, explicaciones e información clave a tu audiencia. El bloque Rich Text en LumoPages es tu herramienta versátil para agregar y formatear texto con varios estilos, asegurando que tu contenido sea claro, atractivo y se presente de forma profesional.
En esta guía te mostraremos cómo usar el bloque Rich Text de manera efectiva y explorar sus completas opciones de formato.
¿Qué es un bloque Rich Text?
Un bloque Rich Text es un bloque de contenido que te permite agregar texto a las etapas de tu Lumo y aplicar varias opciones de formato (como negrita, cursiva, diferentes tamaños de fuente, colores, listas y encabezados) sin necesidad de conocimientos de programación. Es como un mini procesador de textos integrado directamente en tu editor de LumoPages.
Paso a paso: agregar tu primer bloque Rich Text
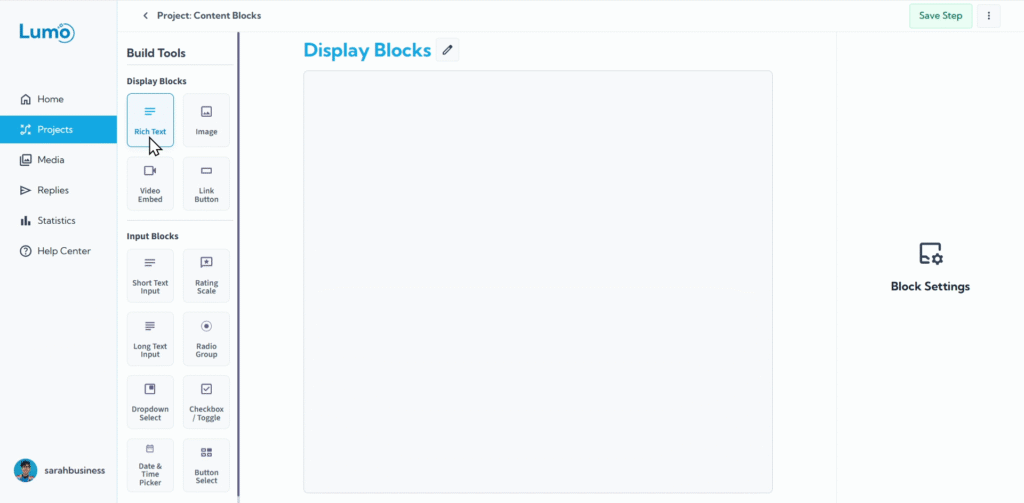
Empieza a escribir tu contenido: El bloque Rich Text aparecerá en tu etapa. Verás un cursor parpadeante, listo para que escribas tu mensaje o instrucciones.
Formatear tu texto: la barra de herramientas del editor Rich Text
Tan pronto como selecciones el bloque Rich Text o empieces a escribir, normalmente aparecerá una barra de herramientas encima o debajo del bloque. Esta barra contiene todas las opciones que necesitas para formatear tu texto.
Aquí tienes un desglose de las opciones de formato comunes que encontrarás:
1. Estilo de texto básico
- Bold (B): Hace que el texto destaque. Úsalo para enfatizar frases clave o instrucciones.
- Italic (I): Añade énfasis o indica un título/cita.
- Underline (U): Llama la atención sobre palabras específicas.
2. Encabezados
Los encabezados son cruciales para estructurar tu contenido, mejorar la legibilidad y ayudar a los usuarios a escanear rápidamente tu Lumo.
- Selecciona el texto que quieres convertir en encabezado.
- Elige el nivel de encabezado deseado en la barra de herramientas.
3. Listas
Organiza la información claramente con viñetas o listas numeradas.
- Bullet List: Para elementos sin orden (por ejemplo, una lista de servicios).
- Numbered List: Para instrucciones paso a paso o elementos ordenados.
4. Alineación de texto
Controla cómo se sitúa tu texto en la página:
- Align Left: Alineación estándar para la mayoría del texto.
- Align Center: A menudo usado para títulos o declaraciones cortas e impactantes.
- Align Right: Menos común, pero útil para necesidades de diseño específicas.
5. Color de texto y color de resaltado
Personaliza tu texto para que coincida con tu marca o resalta información importante.
- Text Color: Cambia el color de tu fuente.
- Highlight Color: Añade un color de fondo al texto seleccionado, como un resaltador digital.
6. Tamaño y peso del texto
Ajusta la prominencia visual de tu texto.
- Text Size: Elige entre tamaños predefinidos (por ejemplo, Small, Medium, Large) o tamaños de fuente específicos.
- Text Weight: Haz el texto más grueso o más ligero más allá de la opción bold estándar, si está disponible (por ejemplo, "Light", "Normal", "Bold").
7. Enlaces
Haz que partes de tu texto sean clicables, dirigiendo a los usuarios a otras páginas o recursos.
- Selecciona el texto que quieres convertir en enlace.
- Haz clic en el icono "Link" (a menudo un eslabón de cadena).
- Introduce la URL a la que debe enlazar el texto.
8. Borrar formato
Si quieres eliminar todo el formato del texto seleccionado y volver a texto plano, usa la opción "Clear Formatting" (a menudo un icono de borrador).
Guardar tus cambios
Cuando trabajas en tu Lumo, especialmente con bloques de contenido, es importante saber que LumoPages requiere que guardes tus cambios manualmente. Este diseño intencional garantiza que ninguna modificación accidental se publique en tu Lumo publicado, protegiendo la experiencia de tu audiencia.
- Localizar el botón Save: Normalmente encontrarás un botón "Save" destacado en la interfaz del editor, generalmente en la esquina superior derecha o en la barra de herramientas.
- Hacer clic para guardar: Haz clic en este botón con frecuencia a medida que realizas cambios en tu Lumo.
Si intentas salir del editor después de hacer cambios sin guardar, LumoPages te recordará que guardes tu trabajo. Presta siempre atención a estos avisos para evitar perder tu progreso, ¡especialmente si tu Lumo está activo!
Dominar el bloque Rich Text te permite comunicarte de manera efectiva y mejorar visualmente tus Lumos, haciéndolos más atractivos y fáciles de usar. A continuación, veremos cómo agregar elementos visuales como imágenes.